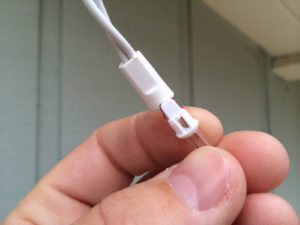
 Step 1:
Blown Fuses
Blown fuses are one of the biggest culprits of broken Christmas lights — especially if the entire chain of lights is non-functional. The good news is that they can easily be replaced!
With the plug in hand, slide the door marked “Open” in the direction pointed by the arrow.
Remove the two fuses, and inspect them by looking at them up against a bright background (such as the sky). If the fuse is good, you should see an unbroken strand of wire running between the two metal contacts.
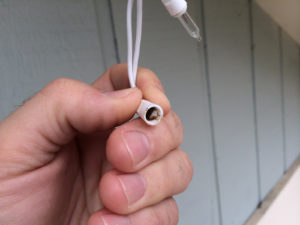
 Step 2:
Defective Light
If a specific section of the lights isn’t working, there might be a bad bulb, or a bad connection between the bulb and the socket.
Bulbs are generally made to not break the whole chain if the bulb burns out, but sometimes a manufacturing defect will prevent the bulbs from maintaining the electrical connection for the rest of the lights.
Gently grasp each bulb, and pull away from the socket. Inspect it and ensure that the two bulb copper leads are in their proper location, and not twisted or missing.
Continue with each non-functional bulb in the chain, up until you find the culprit(s).
 Step 3:
Corroded Socket
Make sure the lights are completely unplugged from any electrical sockets before proceeding further.
Over time, the contacts inside the socket can become corroded or filled with dirt and grime. This can prevent proper contact between the bulb and the socket, which often results in no power to the bulb.
Use a small file or scratch brush to clean the wire contacts of the socket.
Once the socket is clean, insert a new bulb into the socket.
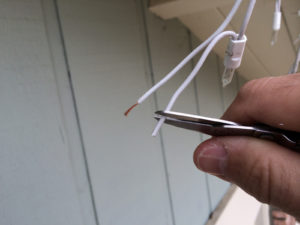 Step 4:
Bad Socket Or Wiring
Make sure the lights are completely unplugged from any electrical sockets before proceeding further.
If all else fails, the bulb socket may be broken beyond repair. Removing it is a cinch though, and should restore functionality to the rest of your lights!
Use a wire cutter to remove the defective socket from the light strand.
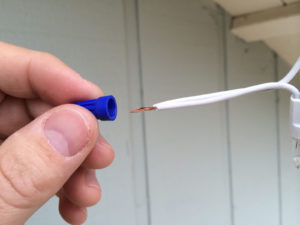 Step 5:
Wire Nut
Strip about 1/2″ of insulation from both wires.
Twist the wires together and insert them into the twist-on wire connector. Turn the connector several times until the cap feels secure, and you can tug on it without it falling off.
After testing the lights and making sure the bad socket fixed the problem, consider putting in some silicone sealant (or museum wax) into the cap in order to keep moisture out and prevent the wires from corroding.